Create a SendGrid account in Azure
RCL Cloud Services applications uses SendGrid to send emails.
Prerequisites
Before you create a SendGrid account in Azure, you should have completed the following task:
Create a SendGrid account
You will deploy SendGrid to your Azure account as follows :
In the menu on the left, click New

Click Add-ons and then SendGrid Email Delivery

Complete the signup form and select Create
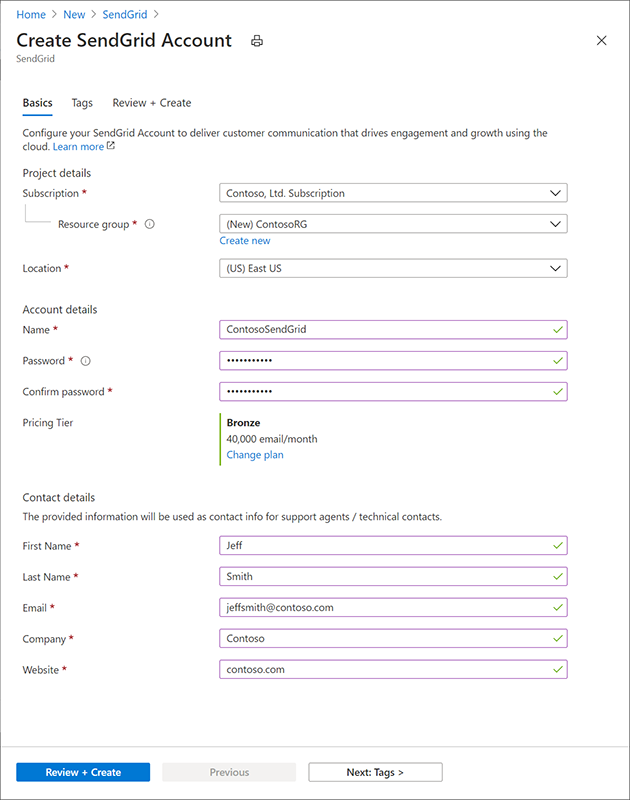
Enter a Name to identify your SendGrid service in your Azure settings. Names must be between 1 and 100 characters in length and contain only alphanumeric characters, dashes, dots, and underscores. The name must be unique in your list of subscribed Azure Store Items.
Enter and confirm your Password.
Choose your Subscription.
Create a new Resource group or use an existing one. You can use the resource group we created for the database and storage.
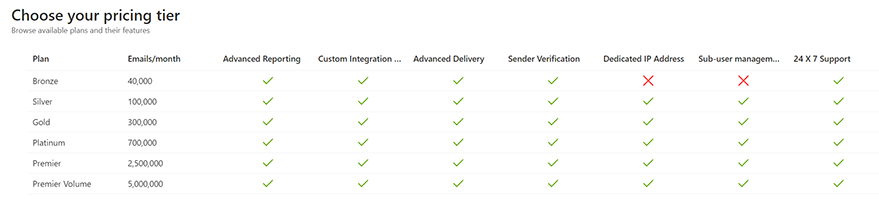
In the Pricing tier section select the SendGrid plan you want to sign up for. There is a Free tier available for Azure subscribers.
Enter your Contact Information.
Review and accept the Legal terms.
After confirming your purchase you will see a Deployment Succeeded pop-up and you will see your account listed in the All resources section.

After you have completed your purchase and clicked the Manage button to initiate the email verification process, you will receive an email from SendGrid asking you to verify your account. If you do not receive this email, or have problems verifying your account, please see this FAQ.
To find your SendGrid API Key :
Click Manage
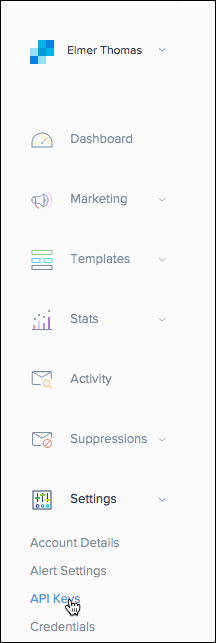
 In your SendGrid dashboard, select Settings and then API Keys in the menu on the left.
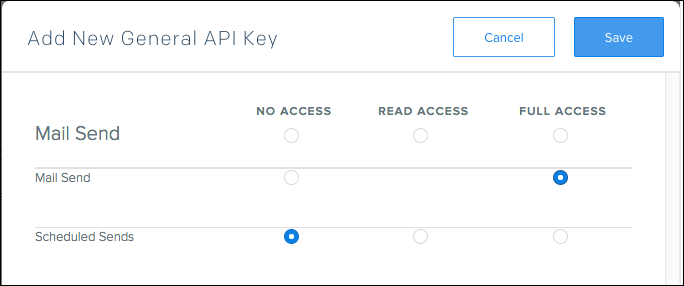
Click the Create API Key dropdown and select General API Key.
At a minimum, provide the Name of this key and provide full access to Mail Send and select Save.
Your API will be displayed at this point one time.
Please be sure to store it safely, we will use it to configure our web application settings later on.