Configure Email Marketing Service
In this section we will configure Email Marketing Service by setting the application settings.
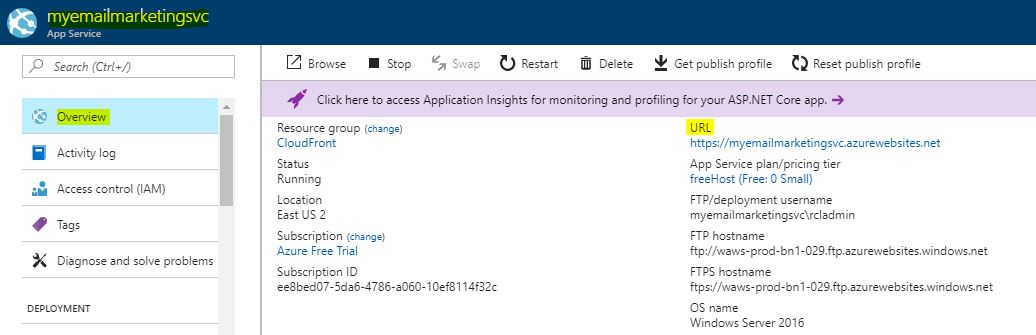
Get the URL of the web application.
In the resource group, click on the web app. In the web app page, click the Overview link and copy the URL link for the next step. Change the link to use http:// and not https://
Add sign-on and security with Identity Service
Open the Identity Service application. Log in to the Admin section and click on the Clients link. In the 'Client Applications' page, click the Create New link
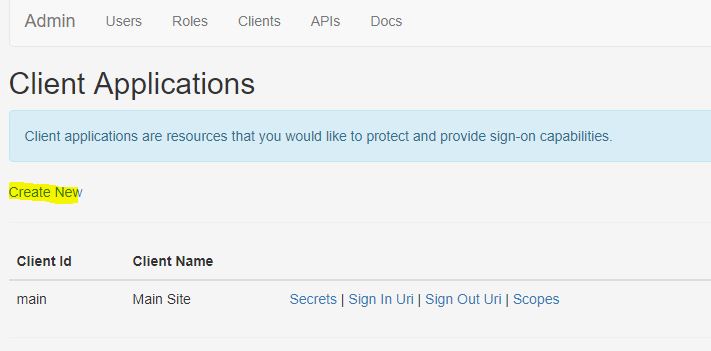
Create a new Client Application for Email Marketing Service. Click the Create button when you are done.

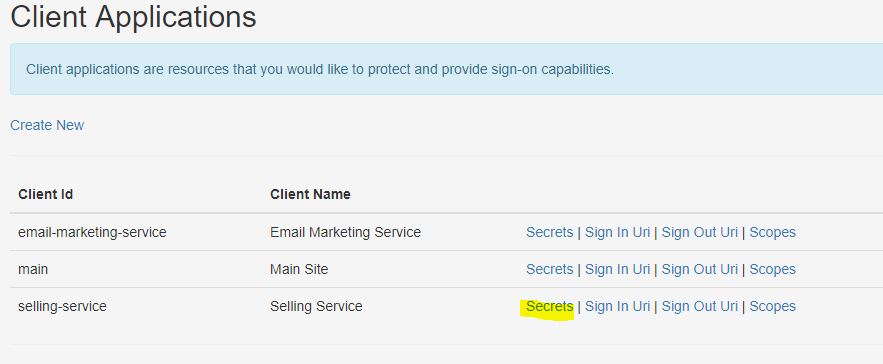
In the Client Applications list, click on the Secrets link to add a Client Secret for Selling Service

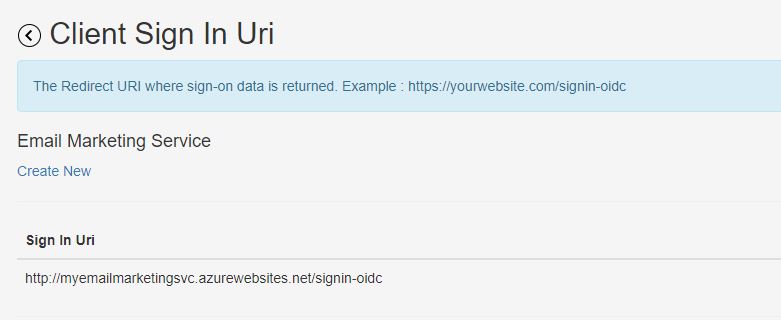
Create a Sign In Uri for Email Marketing Service using the URL link you copied from the previous step for the Email Marketing Service website; and add the following text to the end of the link : 'signin-oidc' .
Ensure you use 'http://' instead on 'https://' for the Sign In Uri.
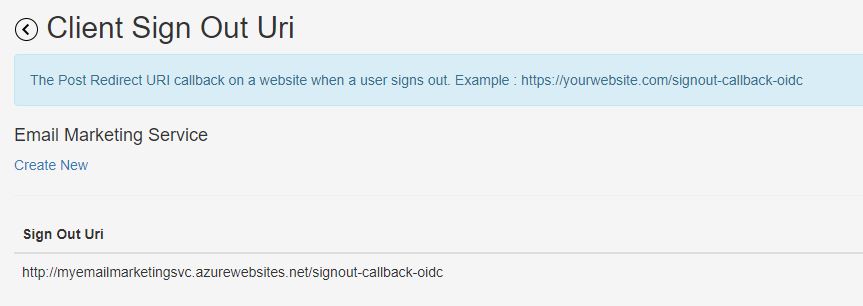
Create a Sign Out Uri for Email Marketing Service by adding the following text to the end of the Email Marketing Url you copied earlier : 'signout-callback-oidc'.
Ensure you use 'http://' instead on 'https://' for the Sign Out Uri.
After you complete these steps, Sign-On and security can now be provided by Identity Service for the Selling Service application.
Get the database connection
Selling Service requires a database to store data. In this step we will get the connection string for the database.
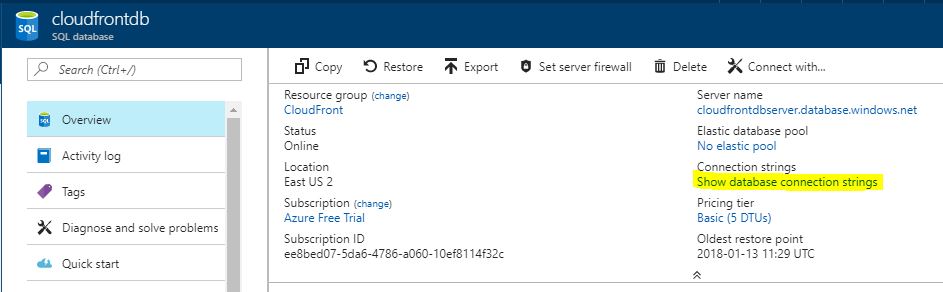
In the resource group, click on the database you create previously, then click on the show database connection string.
Copy the database connection string for ADO.NET
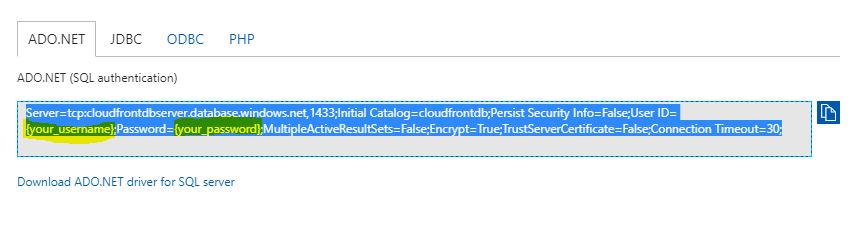 Replace the username and password placeholders with the username and password for your database. Copy this code to a safe location because we will use it to configure our web application settings later on.
Get the SendGrid API Key
Please refer to this section to create a SendGrid account and get the SendGrid API Key:
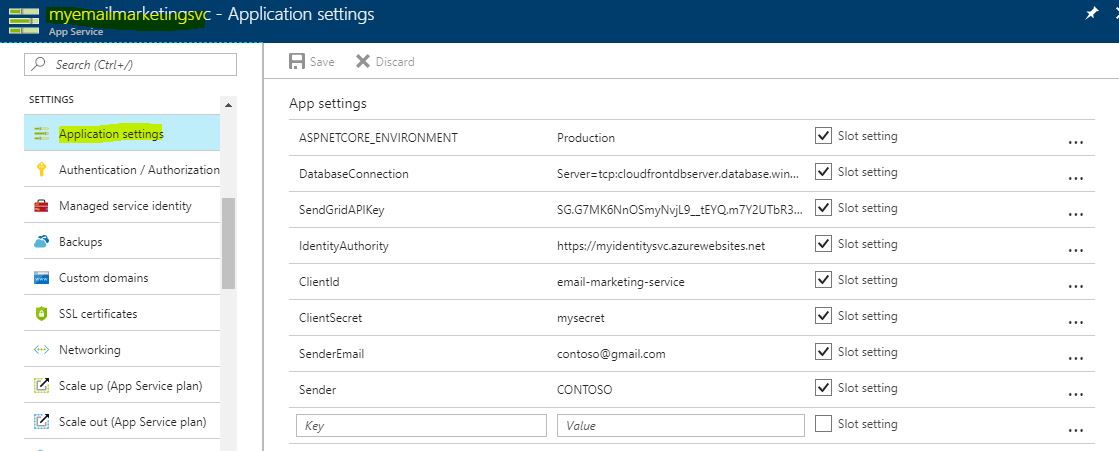
Add application settings to the web app
In the resource group, click on the web app
In the web app, scroll down to 'Settings' and click on Application settings
In the 'Application settings' page, scroll down to the App settings section and add the following Key-Value settings:
ASPNETCORE_ENVIRONMENT - set it to Production
DatabaseConnection - add the database connection string we acquired from the previous steps
SendGridAPIKey - add the SendGrid API Key we acquired from previous steps
IdentityAuthority - set it to the Url of the Identity Service application. **Use 'https://' instead of 'http://'
ClientId - the Client Id that was set for the Email Marketing Service application in Identity Service
ClientSecret - the Secret that was set for the Email Marketing Service application in Identity Service
SenderEmail - the email address for the sender to display in your emails
Sender - the sender name to display in your emails
Ensure the 'Slot setting' is ticked for all the settings. Click the Save button when you are done.
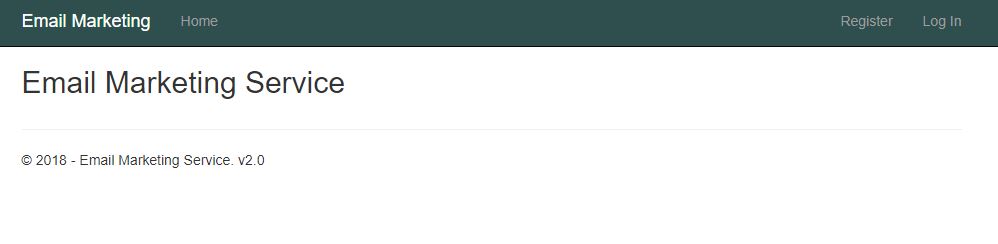
Click the Overview link in the web app and then use the URL link to launch the web application in the browser. Remember to launch your app with 'http://' instead of 'https://'
Once everything is properly configured , the Email Marketing Service application website will display as follows:
 Next
Next